

If you want to expand your collection of Raindrop Peperomia (Peperomia polybotrya) or share the beauty of this popular houseplant with others, propagating it through leaf or stem cuttings is a simple and rewarding method. With patience and care, you can easily create new plants from existing ones. In this easy propagation guide, we’ll walk you through the step-by-step process to successfully propagate Raindrop Peperomia, allowing you to enjoy the lush green foliage and striking teardrop-shaped leaves in abundance.
A brief description of raindrop peperomia
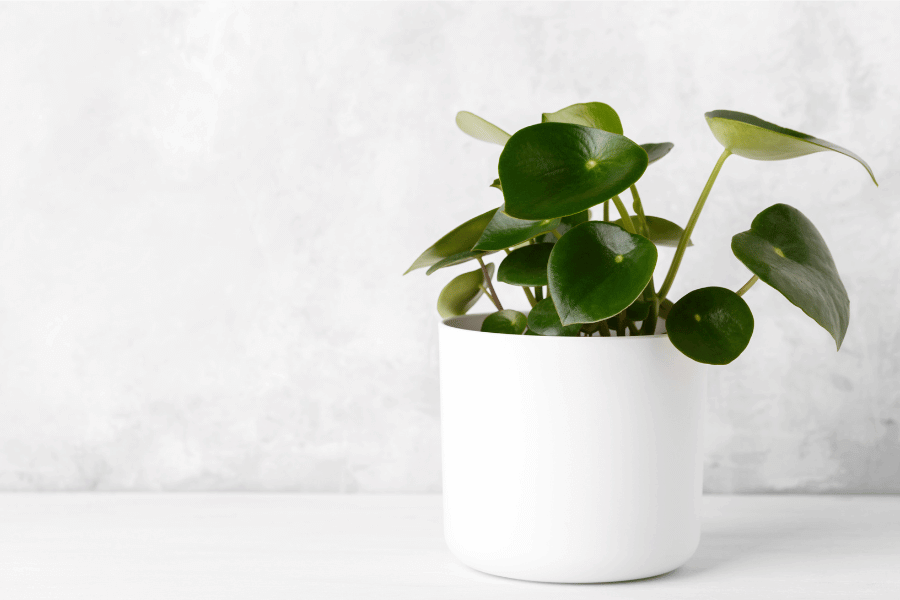
Raindrop Peperomia, scientifically known as Peperomia polybotrya, is a charming and popular houseplant cherished for its unique foliage. This tropical plant is native to South America’s tropical regions and belongs to the Piperaceae family. The Raindrop Peperomia gets its name from the shape of its leaves, which resemble droplets or raindrops, and it is also commonly called Coin Leaf Peperomia or Coin Plant. (However, some will say that the peperomia polybotrya plants have heart-shaped leaves)

The Raindrop Peperomia features thick, fleshy leaves that are glossy and succulent-like in texture. The leaves are typically a vibrant shade of deep green and grow in a rosette formation, giving the plant an appealing compact and bushy appearance. The leaf is oval with a rounded tip and a slight indentation near the stem, resembling a miniature water droplet.
This peperomia species is relatively compact and doesn’t grow very tall, making it an excellent choice for indoor gardening or small spaces. It typically reaches a height of around 8-12 inches (20-30 cm) and has a spread of 8-10 inches (20-25 cm).
Raindrop Peperomia is a low-maintenance plant suitable for beginners and experienced plant enthusiasts. It thrives in bright, indirect light but tolerates lower light conditions. The plant prefers well-draining soil and requires regular watering, allowing the top inch of soil to dry out between waterings to avoid overwatering.
Overall, the Raindrop Peperomia is admired for its attractive foliage, compact size, and ease of care, making it a popular choice for indoor plant enthusiasts and collectors alike.
How to propagate Raindrop Peperomia
The best way to propagate Raindrop Peperomia can vary depending on personal preference and available resources. However, stem and leaf cuttings are two common and effective methods for propagating Raindrop Peperomia. Here are four different ways to propagate raindrop peperomia plants:
By Stem Cuttings in Soil
Propagating Raindrop Peperomia through stem cuttings in the soil is a simple and effective method. Here’s a step-by-step guide on how to do it:
- Gather the necessary materials: You’ll need a healthy Raindrop Peperomia plant, clean pruning shears or scissors, a small pot or container with drainage holes, well-draining potting soil, and water.
- Choose a suitable stem: Select a healthy stem from the Raindrop Peperomia plant with several leaves. Look for a stem that is not too long or leggy. Make sure to choose a leaf that has at least 2 leaf nodes.
- Prepare the stem cutting: Make a clean cut just below a node using clean pruning shears or scissors. Nodes are the points where leaves emerge from the stem.
- Remove lower leaves: Trim off the lower leaves from the stem, leaving only a few leaves at the top. This helps focus the plant’s energy on root development.
- Prepare the potting mix: Fill the small pot or container with well-draining potting soil. You can use a mixture of peat moss, perlite, and/or vermiculite to create a loose and airy medium.
- Plant the stem cutting: Make a small hole in the soil mix using your finger or a pencil. The hole should be deep enough to accommodate the lower part of the stem cutting. Insert the stem cutting into the hole and gently press the soil around the base of the stem to hold it in place.
- Water the cutting: Thoroughly water the stem cutting, ensuring the soil is evenly moist. Avoid overwatering, as it can lead to rot. Allow the excess water to drain out through the drainage holes.
- Create a mini greenhouse: To increase humidity and create a favorable environment for rooting, cover the pot with a clear plastic bag or place a clear plastic dome over it. This will help retain moisture and create a mini greenhouse effect.
- Provide optimal conditions: Place the pot in a warm location with bright, indirect light. Avoid direct sunlight, as it can scorch the delicate cutting. Maintain a temperature of around 70-75°F (21-24°C) for optimal growth.
- Monitor and care for the cutting: Check the cutting regularly to ensure the soil remains lightly moist but not waterlogged. Mist the cutting with water as needed to maintain humidity. Be patient, as it can take several weeks for roots to develop.
- Root development: After a few weeks, gently tug on the cutting to check for resistance, which indicates root development. Once roots have formed, the cutting will be ready to grow independently.
- Transplant the rooted cutting: Once the roots have developed and the cutting has grown a few new leaves, you can carefully transplant it into a slightly larger pot filled with well-draining soil.
By Stem Cutting in Water
Propagating Raindrop Peperomia through stem cuttings in water is another popular and effective method. Here’s a step-by-step guide on how to do it:
- Gather the necessary materials: You’ll need a healthy Raindrop Peperomia plant, clean pruning shears or scissors, a glass or jar filled with water, and a warm location with bright, indirect light.
- Choose a suitable stem: Select a healthy stem from the Raindrop Peperomia plant with several leaves. Look for a stem that is not too long or leggy.
- Prepare the stem cutting: Make a clean cut just below a node using clean pruning shears or scissors. Nodes are the points where leaves emerge from the stem.
- Remove lower leaves: Trim off the lower leaves from the stem, leaving only a few leaves at the top. This helps prevent the leaves from rotting in the water.
- Place the cutting in water: Fill a glass or jar with clean water, ensuring that the lower part of the stem cutting is submerged. Ensure no leaves touch the water, as this can lead to rot.
- Find the right location: Place the glass or jar in a warm location with bright, indirect light. Avoid direct sunlight, which can be too harsh for delicate cutting.
- Monitor and change water: Check the water level regularly and ensure it remains clean. If the water becomes cloudy or discolored, replace it with fresh water.
- Wait for root development: Be patient and give the cutting time to develop roots. It can take several weeks for roots to appear. Roots will typically grow from the nodes of the stem.
- Transfer to soil: Once the cutting has developed a good root system with several roots, it can be transferred to the soil. Prepare a small pot with well-draining potting soil.
- Plant the rooted cutting: Gently remove the cutting from the water and carefully place it in the prepared pot, ensuring the roots are covered with soil. Lightly press the soil around the base of the stem to secure it.
- Provide optimal conditions: Place the newly potted cutting in a warm location with bright, indirect light. Water the soil lightly to settle it around the roots. Avoid overwatering, as the plant is still establishing itself.
- Care for the new plant: Continue to provide proper care to the newly potted Raindrop Peperomia, including regular watering, appropriate lighting, and occasional fertilization, to support its growth and development.
Leaf cuttings
Propagating Raindrop Peperomia through leaf cuttings is a simple and effective method. Here’s a step-by-step guide on how to do it:
- Select a healthy leaf: Choose a mature and healthy leaf from the Raindrop Peperomia plant. Look for a leaf that is not too old or damaged.
- Prepare the leaf-cutting: Using clean scissors or a sharp knife, make a clean cut at the base of the leaf, ensuring that a small portion of the stem (petiole) is attached to the leaf. This will improve the chances of successful propagation.
- Cut the leaf into sections (optional): If it is large, you can cut it into smaller sections, ensuring each section has a vein attached. This increases the number of potential new plants you can propagate.
- Prepare the planting medium: Fill a small container or tray with a well-draining potting mix. You can use a mixture of peat moss, perlite, and/or vermiculite to create a loose and airy medium.
- Create planting holes: Make small holes or indentations in the soil using your finger or a pencil. The holes should be deep enough to hold the leaf sections or the entire leaf.
- Plant the leaf cuttings: Place the leaf sections or the entire leaf into the prepared holes, ensuring the vein side faces downwards and the top part is exposed. Gently press the soil around the base of the leaf to hold it in place.
- Mist the cuttings: Lightly mist the leaf cuttings with water to increase humidity and promote moisture retention. Be careful not to overwater, as excess moisture can lead to rot.
- Create a mini greenhouse: To maintain humidity and create a favorable environment for root development, cover the container with a clear plastic bag or place it inside a clear plastic dome. This will help create a mini greenhouse effect.
- Provide optimal conditions: Place the container in a warm and bright location, away from direct sunlight. The ideal temperature for root development is around 70-75°F (21-24°C). Ensure the cuttings receive indirect light for several hours each day.
- Maintain moisture: Check the soil regularly and mist the cuttings to moisten the soil. Avoid waterlogging or allowing the soil to dry out completely.
- Be patient: New roots and plants may take several weeks or months to develop. Patience is key during this propagation process.
- Transplant the new plants: Once the leaf cuttings have developed roots and new growth and are large enough to handle, gently separate them from the leaf and transplant them into pots filled with a well-draining mix.
Tissue culture
Propagating Raindrop Peperomia through tissue culture is a more advanced propagation method that requires specific equipment and knowledge. It involves taking small tissue samples from the plant and culturing them in a sterile environment to produce new plants. Here’s a general overview of the tissue culture process:
- Sterilization: Start by sterilizing all the tools and equipment you’ll use, including scalpels, containers, and culture media. This step is crucial to prevent contamination.
- Tissue sample collection: Select a healthy and disease-free part of the Raindrop Peperomia plant, such as a leaf, stem, or shoot tip. Use a sterilized scalpel or blade to take a small tissue sample.
- Surface sterilization: To eliminate any potential contaminants, the tissue sample needs to undergo surface sterilization. This typically involves dipping the sample in a disinfecting solution like bleach or ethanol for a short period and then rinsing it with sterile water.
- Culture media preparation: Prepare the culture media, a nutrient-rich gel or liquid containing essential elements for plant growth. The specific composition will depend on the stage of tissue culture and the desired results. Agar is often used to solidify the media in gel form.
- Inoculation: Transfer the sterilized tissue sample onto the culture media. This can be done by cutting the sample into smaller pieces, placing them onto the media, or inserting it directly into the gel.
- Incubation: Seal the containers containing the culture media and tissue samples to maintain a sterile environment. Place them in a controlled environment, such as a growth chamber or incubator, with optimal temperature, humidity, and light conditions for tissue growth.
- Subculturing: As the tissue grows, it may need to be transferred to fresh media periodically. This involves removing the growing tissue and placing it into a new culture vessel with fresh media to encourage continued growth and development.
- Plantlet formation: The tissue samples will form callus tissue over time and develop into small plantlets. These plantlets can then be transferred to a separate growth medium to encourage further root and shoot development.
- Acclimatization: Once the plantlets have developed sufficient roots and shoots, they can gradually acclimate to the normal growing conditions outside of tissue culture. This involves slowly exposing them to lower humidity levels, increased light, and eventually transferring them to pots or containers with potting soil.
Tissue culture propagation requires specific equipment, a sterile environment, and knowledge of plant tissue culture techniques. It is commonly done in specialized laboratories or by experienced plant propagators. If you want to propagate Raindrop Peperomia through tissue culture, seeking guidance from experts or specialized resources is recommended to ensure the best chances of success.
10 tips for propagating Raindrop Peperomia successfully
Here are some tips to help you successfully propagate Raindrop Peperomia:
- Choose healthy parent plants: Select robust and healthy Raindrop Peperomia plants for propagation. Healthy parent plants are more likely to produce successful and viable cuttings or leaves.
- Use clean tools and containers: Ensure that your tools, such as pruning shears or scissors, and containers are clean and sterilized before taking cuttings or working with the plants. This helps prevent the spread of diseases and reduces the risk of contamination.
- Select the right type of cuttings: Raindrop Peperomia can be propagated through stem cuttings in soil or water and leaf cuttings. Choose the method that you are most comfortable with or experiment with different methods to find the one that works best for you.
- Provide optimal lighting conditions: Raindrop Peperomia prefers bright, indirect light. Place your cuttings or propagated plants in a location with adequate light to promote healthy growth. Avoid exposing them to direct sunlight, which can cause leaf burn.
- Maintain proper humidity: Peperomia plants appreciate moderately humid conditions. To increase humidity around the cuttings, cover them with a clear plastic bag or place them in a humid environment, such as a terrarium or a tray with a dome. Mist the cuttings regularly to maintain humidity.
- Use well-draining soil or water: If you propagate in soil or water, ensure that the medium allows excess moisture to drain. Well-draining soil or water helps prevent waterlogging, which can lead to root rot.
- Be patient: Propagation takes time, and it may take several weeks or months for roots to develop and new plants to grow. Be patient and resist the temptation to frequently disturb or check on the cuttings.
- Maintain consistent care: Provide regular care to your propagated Raindrop Peperomia plants. This includes watering when the soil or water medium starts to dry out, avoiding overwatering, and periodically fertilizing with a balanced houseplant fertilizer according to the manufacturer’s instructions.
- Monitor for pests and diseases: Monitor for pests such as aphids, mealybugs, or spider mites, and promptly address any infestations. Also, watch for signs of diseases like root rot or fungal issues. If you notice any problems, take appropriate steps to treat them and prevent further spread.
- Learn from the process: Propagation is a learning experience. Observe and take note of what works well for your Raindrop Peperomia plants and what doesn’t. Experiment with different methods and techniques to refine your propagation skills
Remember, successful propagation combines knowledge, patience, and care. With these tips and a little practice, you’ll increase your chances of successfully propagating Raindrop Peperomia and expanding your collection of these lovely plants.
how to care for a brand new peperomia raindrop plant
To care for a brand new Raindrop Peperomia plant, follow these guidelines:
Placement:
Choose a suitable location for your Raindrop Peperomia that receives bright, indirect light. Avoid placing it in a place that receives many hours of direct sunlight, as it can scorch the leaves. A north-facing window or a spot a few feet away from an east or west-facing window is usually ideal.
Temperature:
Raindrop Peperomia thrives in average room temperatures ranging from 65°F to 75°F (18°C to 24°C). Protect the plant from cold drafts or sudden temperature changes.
Watering:
Allow the soil’s top inch (2.5 cm) to dry out between waterings. Peperomias prefer slightly moist but not waterlogged soil. Overwatering can lead to root rot. Check the moisture level by inserting your finger into the soil, and water only when it feels dry. Water thoroughly and allow excess water to drain away.
Humidity:
Raindrop Peperomia can tolerate average humidity levels but appreciates slightly higher humidity. You can increase humidity by placing a water tray near the plant or using a humidifier. Misting the leaves occasionally can also help.
Soil:
Use a well-draining potting mix for Raindrop Peperomia. A mixture of peat moss, perlite, and/or vermiculite works well. Good drainage is essential to prevent waterlogged roots.
Fertilization:
Feed your Raindrop Peperomia with a balanced houseplant fertilizer monthly during the growing season (spring and summer). Follow the instructions on the fertilizer packaging for proper dosage. Avoid fertilizing during the winter months when the plant is dormant.
Pruning:
Prune your Raindrop Peperomia to maintain its shape and size. You can pinch back leggy stems to encourage bushier growth. Remove any yellowed, damaged, or diseased leaves promptly to maintain the plant’s health.
Potting and repotting:
If your Raindrop Peperomia outgrows its pot or the roots become crowded, repot it into a slightly larger container with fresh potting soil. Repotting is typically done every 1-2 years in spring.
Pest control:
Watch for common pests like aphids, mealybugs, or spider mites. If you notice any signs of infestation, treat the plant with an appropriate insecticidal soap or neem oil, following the instructions on the product.
Observing the plant:
Regularly check your Raindrop Peperomia for signs of stress, pests, or diseases. Responding to its needs and promptly addressing any issues will help keep the plant healthy and thriving.
Propagating Raindrop Peperomia is a rewarding and straightforward process that can be done through stem or leaf cuttings. Stem cuttings involve taking a healthy stem with leaves, rooting it in well-draining soil or water, and providing the right conditions for root development. On the other hand, leaf cuttings require taking mature leaves with a portion of the stem, planting them in a suitable medium, and creating a humid environment. With patience and proper care, these propagation methods can help you expand your Raindrop Peperomia collection and enjoy the beauty of these unique plants in your home or garden.
Recent Posts
Unlocking the secret to expanding your begonia maculata family is like discovering a treasure trove of green goodness. If you've ever marveled at the stunning beauty of angel wing begonia leaves and...
If you've ever found yourself marveling at the surreal beauty of air plant blooms, you're in for a treat! These enchanting bursts of color amidst a sea of lush green foliage are like nature's way of...